
Arrange shipping documents
There is a program developed by GEMO with which a user, based on FEPA consignments (See program "Arrange shipment"), can combine and send documents such as shipping documents, invoices and delivery bills in a new e-mail. In addition, further documents of the type "Shipping documents" can be imported into the FEPA DMS (Document Management System).
The program was created at the request of the shipping department in Krefeld, which were confronted with requirements of the carrier "Rauh". For the origin see also ticket #020128 (Link User / Admin).
Sales > Customer documents > Shipping documents > Arrange shipping documents
Starting
When the program has been opened, the client and period of the shipments to be searched for can be selected in the selection area. The period refers to the handover date of the shipment (also pickup date) and not to the delivery dates from the connected delivery notes. By clicking on the magnifying glass symbol "Refresh" the data are loaded and the selection area is hidden.
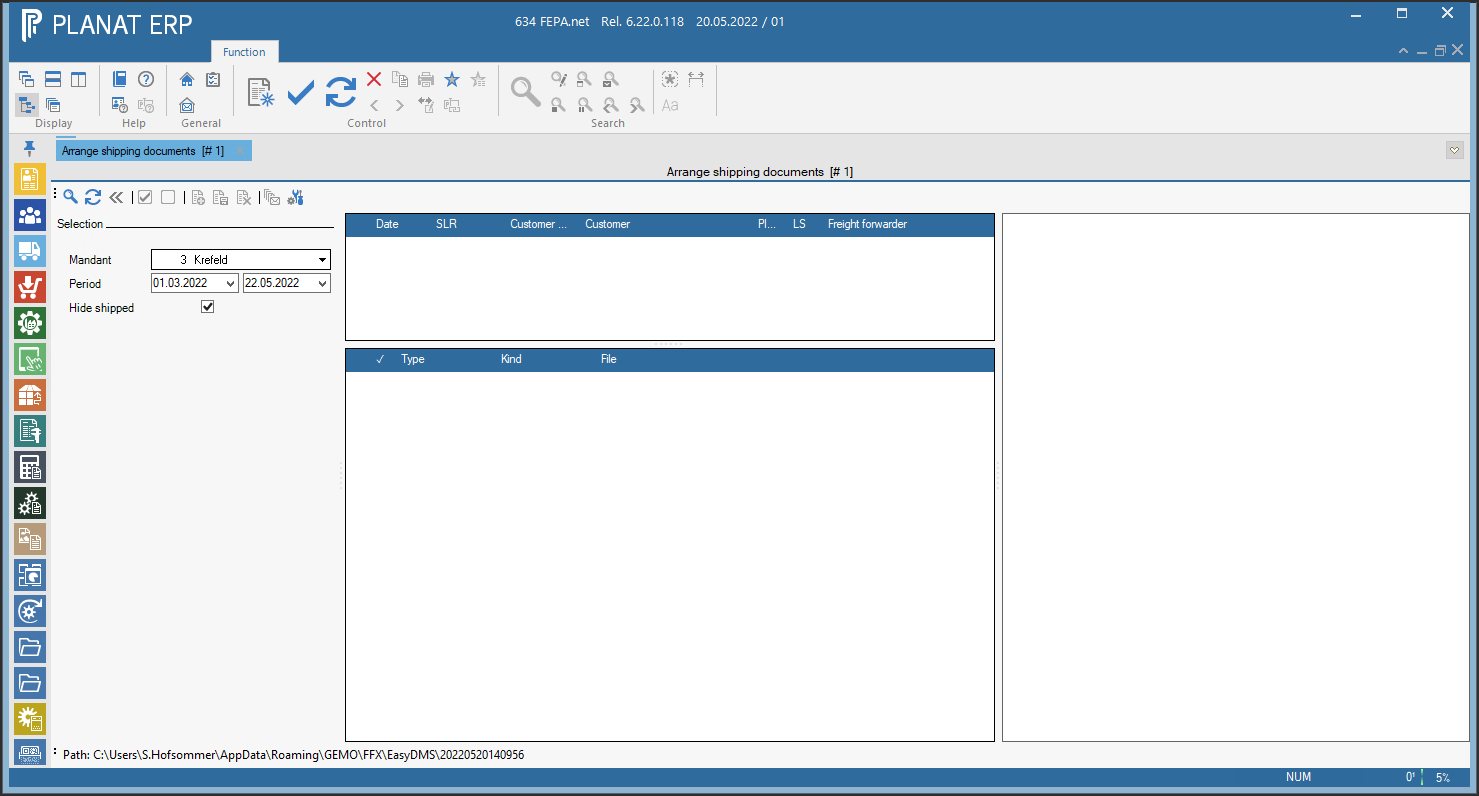
If the "Hide shipped" checkbox is ticked, shipments for which an e-mail has already been generated are no longer displayed. By unchecking the box, these can be made visible again.
Menu

|
No. |
Explanation of the function |
|
1 |
This function starts the search for shipments based on the selection. |
|
2 |
This function reloads only the documents of the current shipment instead of reloading all shipments and their documents. Useful after adding new documents. |
|
3 |
Hides the selection area. Not visible if the selection area is already hidden. |
|
4 |
Displays the selection area. Not visible if the selection area is already visible. |
|
5 |
Adds a check mark to all documents. |
|
6 |
Removes all check marks from the document table. |
|
7 |
Displays the area to add a new document to the selected program. |
|
8 |
Saves the new document to the selected program. |
|
9 |
Cancels adding a new document and hides the input area. |
|
10 |
Creates a new e-mail with the selected settings and documents attached to the e-mail. |
|
11 |
Displays the settings to generate the e-mail subject. |
If you move the mouse over one of the functions, and pause the mouse for a second, then a text is displayed that gives an indication of what will happen when you click.
Load shipments
After clicking the magnifying glass icon, the shipments were loaded based on the selection. In the upper table all shipments are displayed. In addition to the SLR (shipment load reference number), other information is also displayed, such as the number and name of the customer, the customer's plant number, the number of delivery notes and the selected freight forwarder.
In the area to the right of the tables a preview of the selected document is displayed (PDF only).
The plant number corresponds to the plant number transmitted via EDI, but can be overwritten by the so-called plant abbreviation in the program "Edit customer-plant relation".
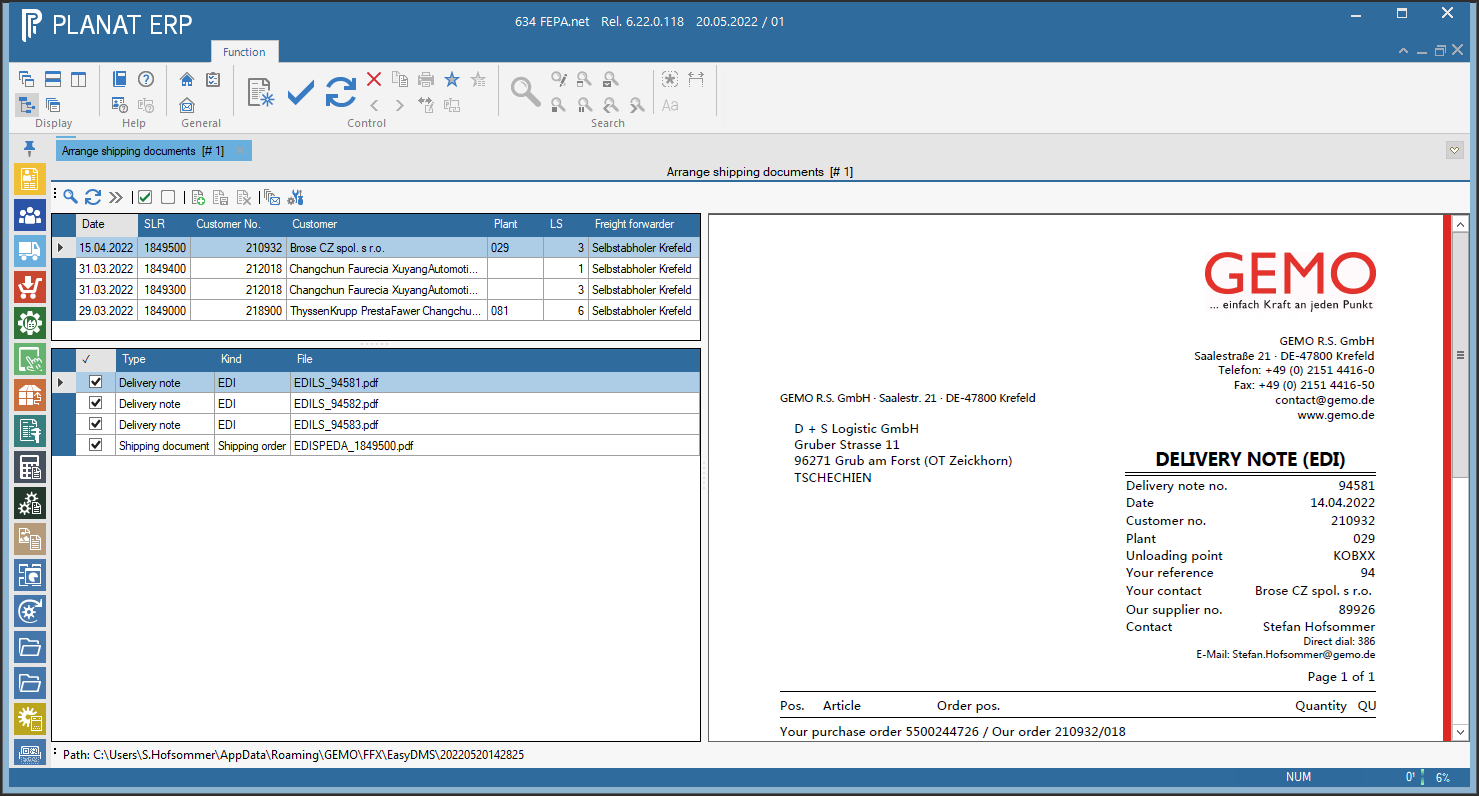
After selecting a shipment (by clicking a row of the upper table), the lower table with the documents belonging to the shipment is displayed. These include delivery notes, invoices and shipping documents.
Add document to shipment
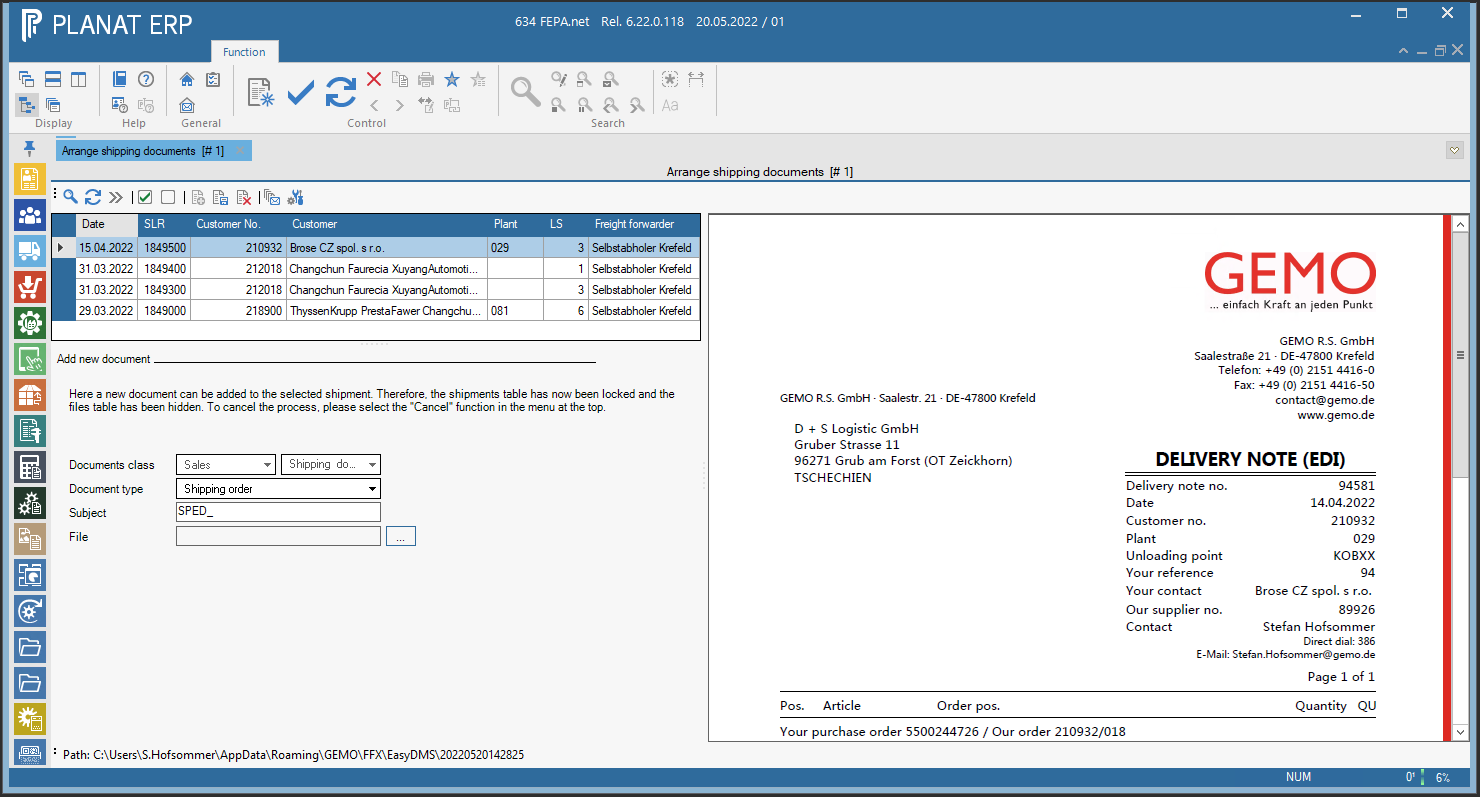
By clicking on "Add document" the upper table is locked and instead of the lower table a new area is displayed. In this area, a new document can be added to the selected shipment. The process can be interrupted at any time by pressing the "Cancel" button. The area will then disappear and the original document table will be displayed again.
Kind of document
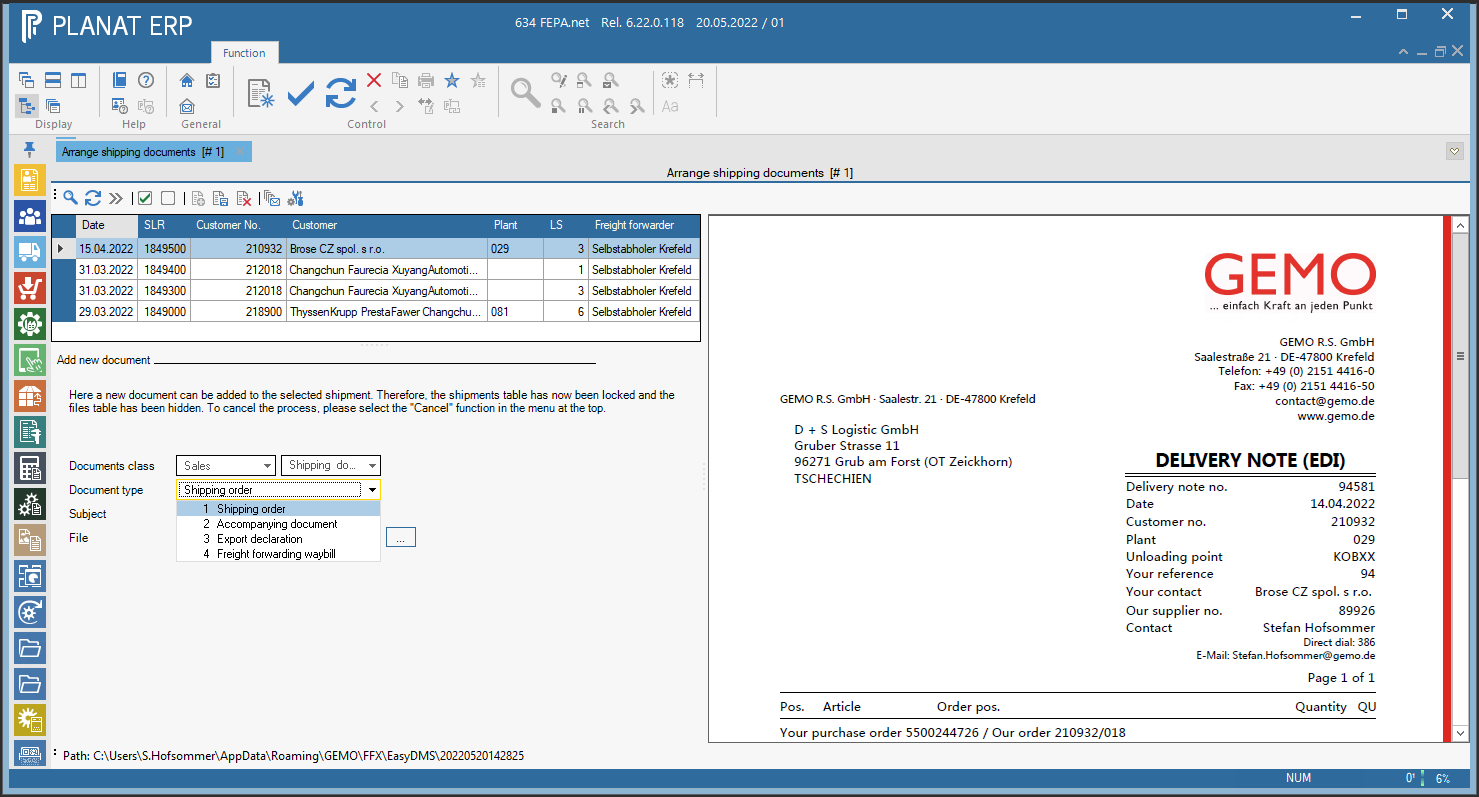
This document must belong to the document class "Sales" and the document type "Shipping document". However, you can select the kind of document. At the moment there is a choice between shipping order, accompanying document, export declaration and freight forwarding waybill.
Document subject
The subject is preset based on the selection of the document type, but can be entered completely freely by the user. It should be chosen in such a way that the document can be found again later without major problems.
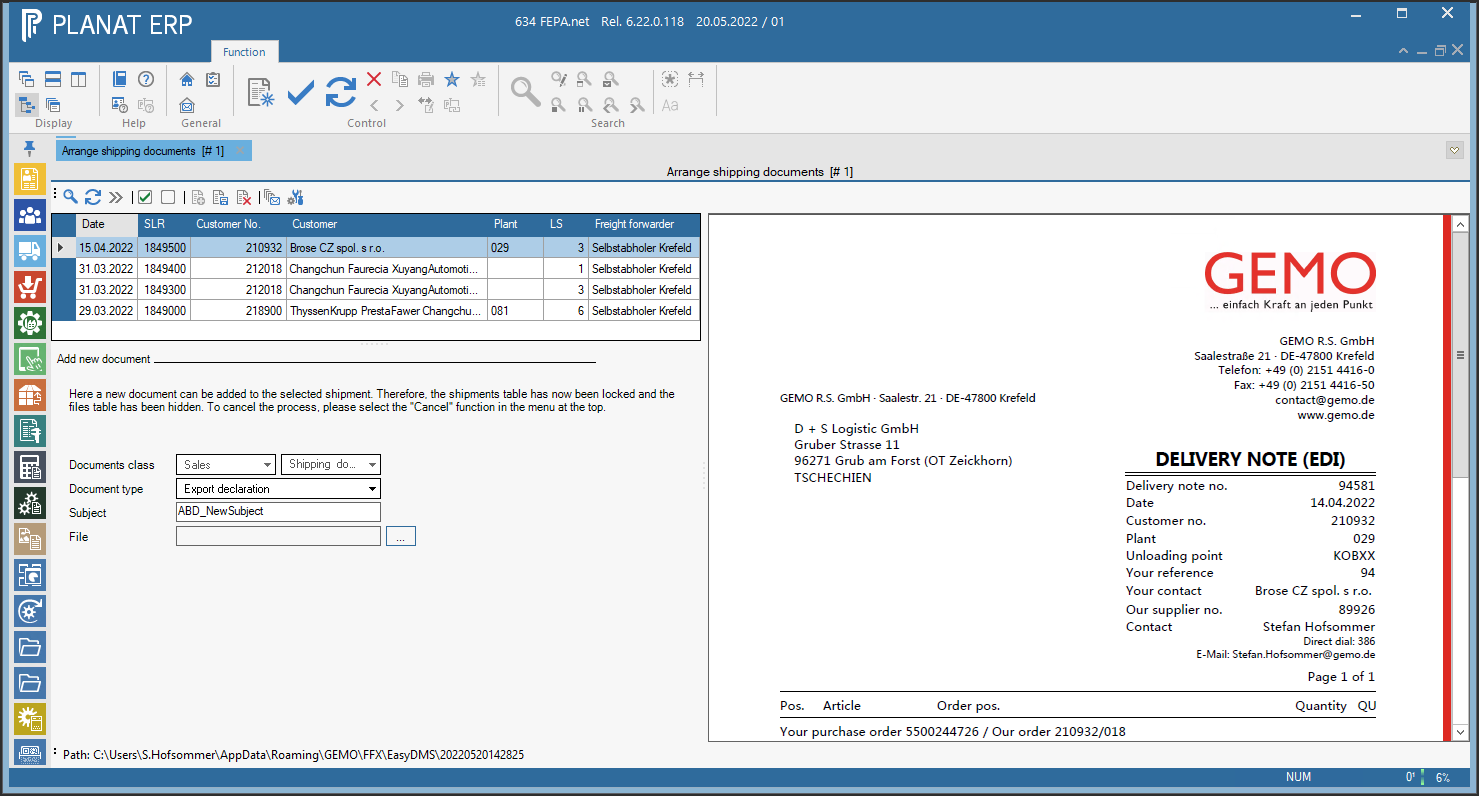
Select files
Files can be selected from the file system by clicking the "[...]" button - at the moment only files of the "PDF" type are supported.
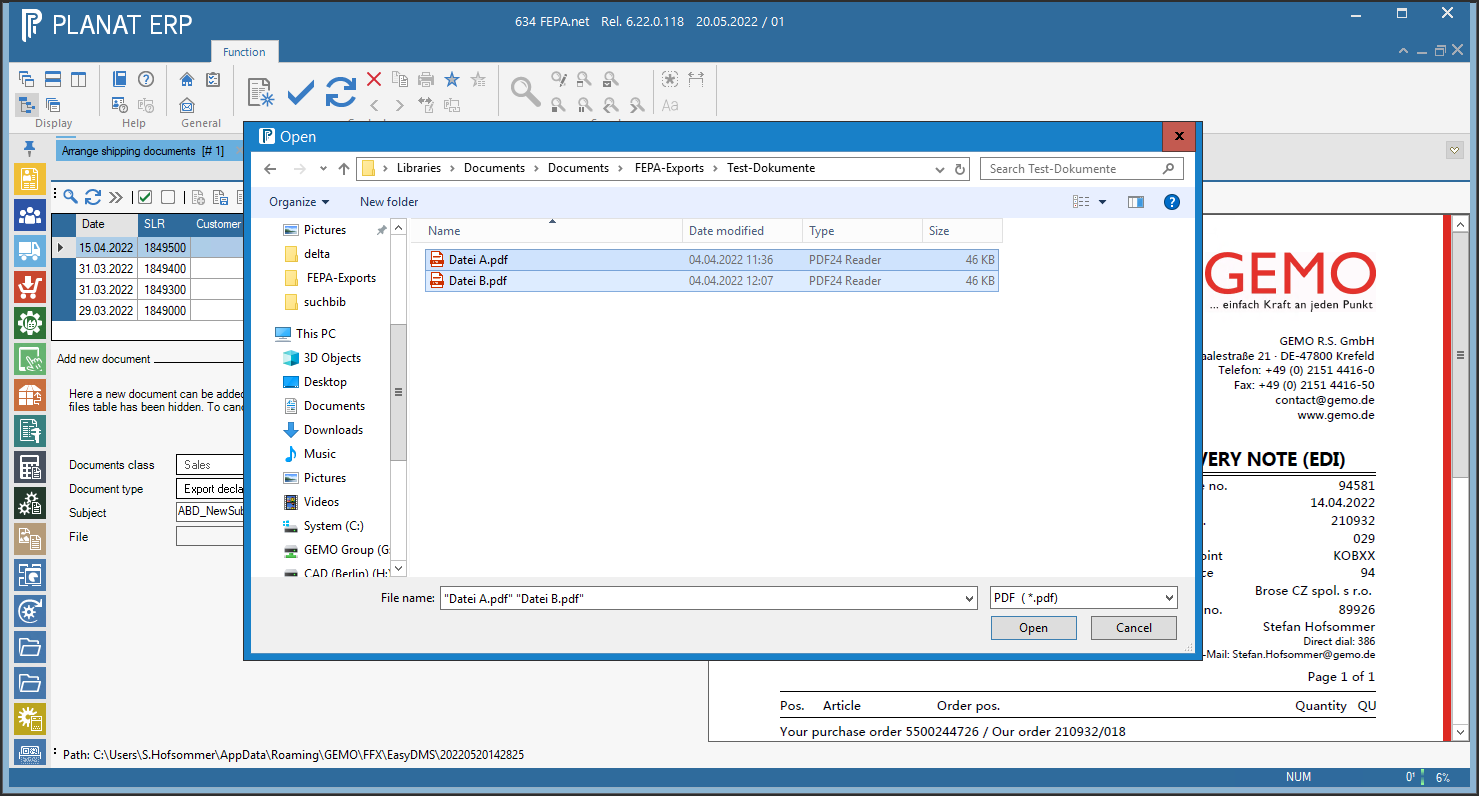
After confirming the file dialog, the selected files are listed in the box next to the "[...]" button.
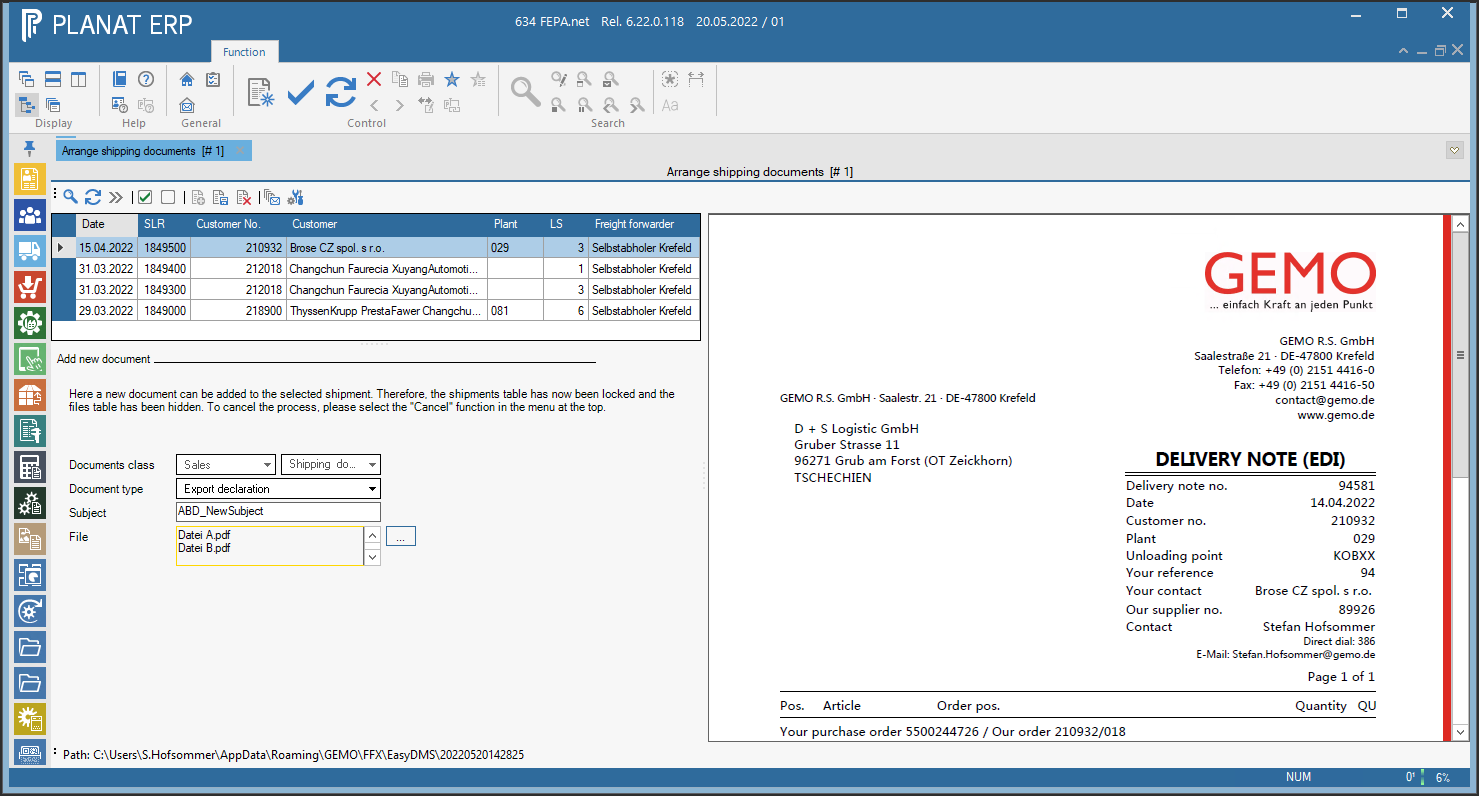
Save the new document
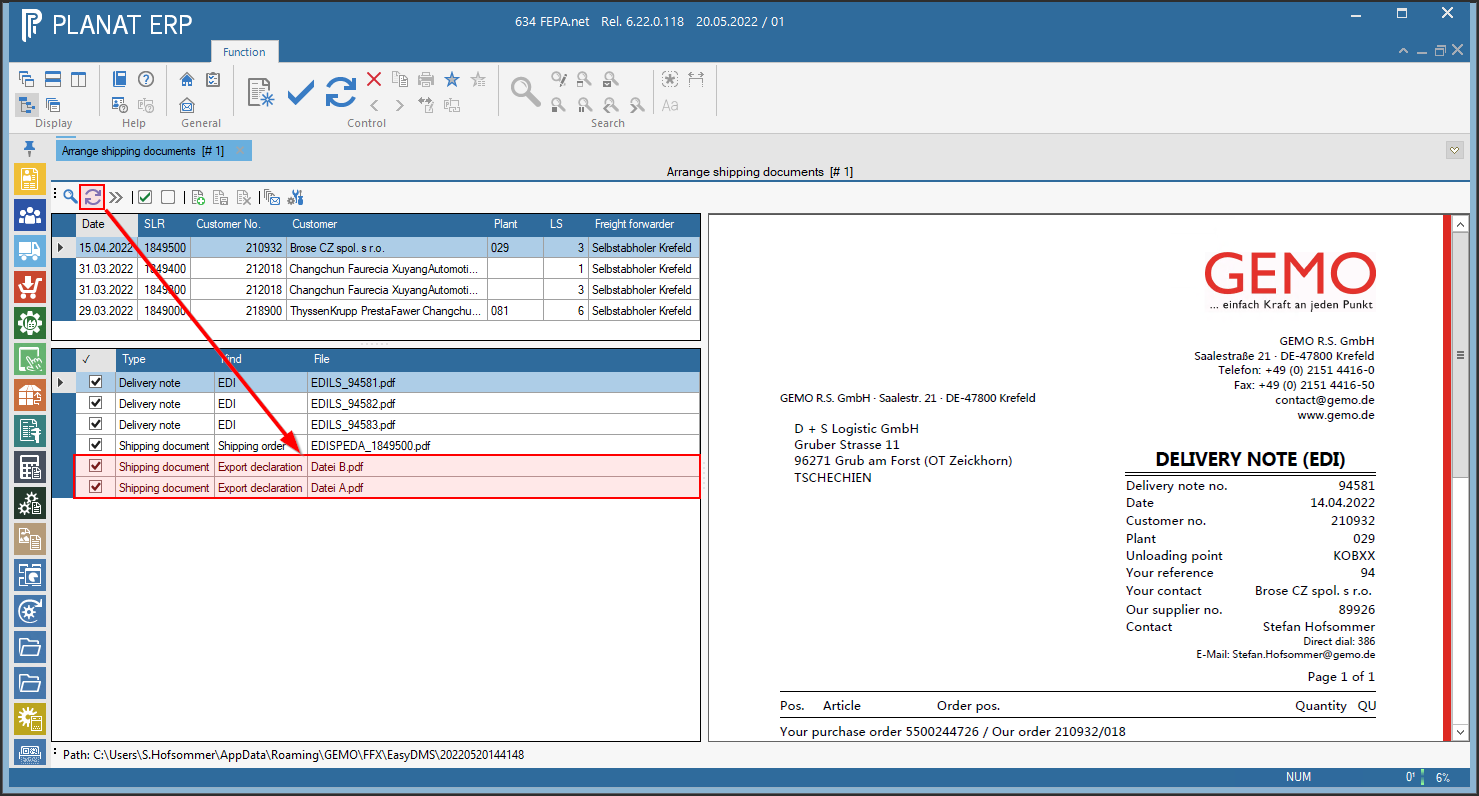
By clicking on the Save button, all files are combined in the new document and sent to the DMS. Depending on server settings and load, it may take up to three minutes for the files to be loaded by the DMS. Usually, however, it should be visible within a few moments.
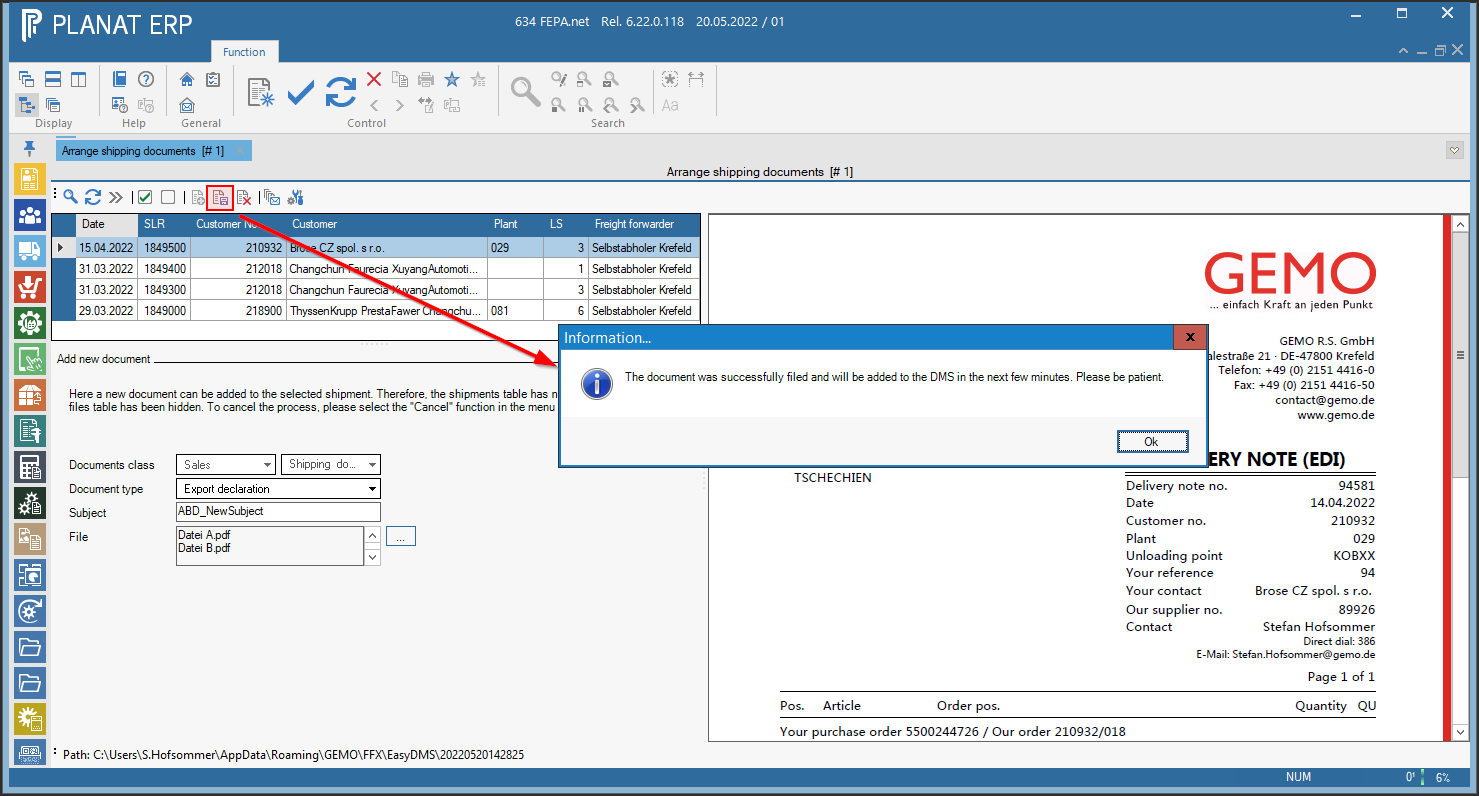
One can click the "Reload documents" button to reload the documents without having to reload all the data. After a few moments the files will be visible:
Create Email
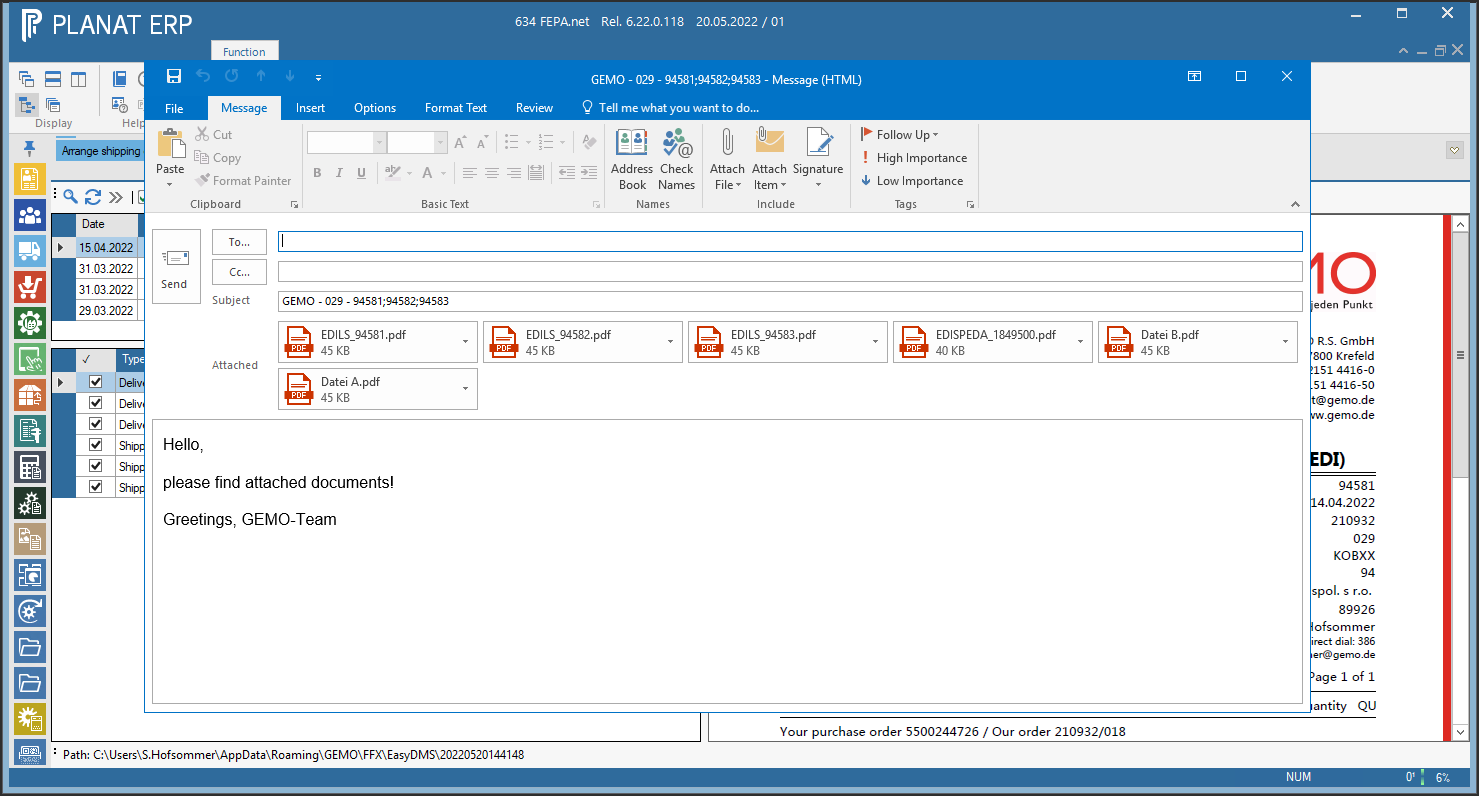
By clicking on "Create e-mail", a new e-mail is created via Outlook based on the selected shipment and displayed to the user. Only if the user clicks on "Send", this e-mail will be sent. The fields of the e-mail will be pre-populated as follows:
- The recipient as well as CC of the e-mail are pre-populated from the invoice or main address of the freight forwarder. These fields must therefore be maintained if they are to be automatically pre-populated.
- The subject of the e-mail is automatically preset from the "Edit Email subject ". See also explanations of the settings options.
- The text of the e-mail consists of a standard text which is stored directly in the code of the program.
- All files that are marked with a check mark (✓) in the file table are collected and attached to the new e-mail.
E-mail subject settings
The subject of the e-mail is suggested automatically. This suggestion can be customized, but is based on the specifications of the freight forwarder Rauh: GEMO - WERK - LS001;LS002;LS003
By clicking on "Edit email subject" the tables disappear and the area to display the email subject appears. There is also a button to preview the subject.
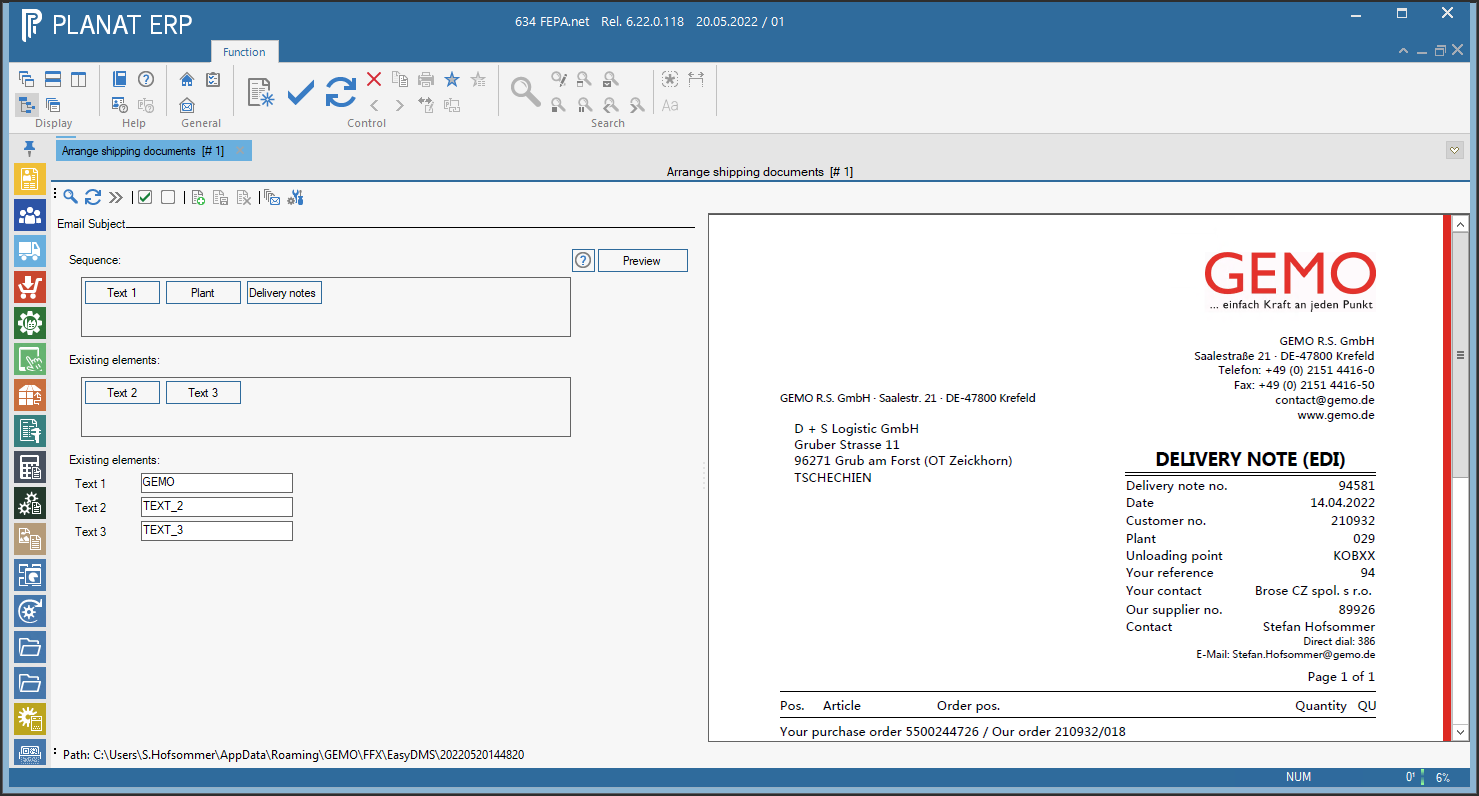
The "Sequence" area contains the elements in exactly the order in which they are then written in the subject. The "Existing elements" area still contains the two elements "Text 2" and "Text 3". By clicking on one of the elements, they are moved to the other area and appended at the end.