Starting with FEPA.net
This chapter is all about starting with FEPA.
Login to FEPA.net
How to get into the PLANAT ERP system named FEPA?
STEP 1: The remote servers
Our ERP system „FEPA” is installed on a group of remote servers. The first step is to connect and login to one of them. The task of choosing the right server is provided by a shortcut which should be placed to your computers desktop automatically. Users of thin-client-devices do not need this this first step because the initial login while starting the device already connects you properly.
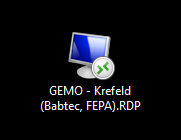
All other users have to use the shortcut GEMO - Krefeld (Babtec, FEPA).RDP on the desktop. If the shortcut was sent to you via e-mail you have to place it at first on your desktop before using it.
STEP 2: Starting the FEPA-Login
After the login on one of the remote servers you should see some FEPA-shortcuts. The first login can take some time as the system needs to create your profile and make all resources available you might need.
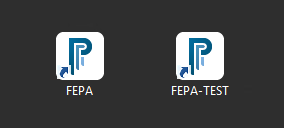
- „FEPANET” starts the productive system.
- „FEPANET-Test” starts the testing system.
The language the system is starting depends on your FEPA user settings and can be changed by IT as well as on your own. To change the language settings on your own read the following page: How to change the FEPA language?
STEP 3: The credentials
Normally FEPA will be opened without asking for your FEPA username nor password because IT configured a so called “Single-Sign-On” function. FEPA will use the username you authenticated yourself starting the computer with (or loged into the remote desktop server with) and, if configured correctly, it will approve your login automatically.
But you do have a password for FEPA and you need to keep it save as every password, usually users receive that starting password with the mail when IT sets up the account. It is needed when working with the handheld scanners (stock taking) or when you need to login on a different computer, for example to give a training to somebody with your login because you have different permissions.
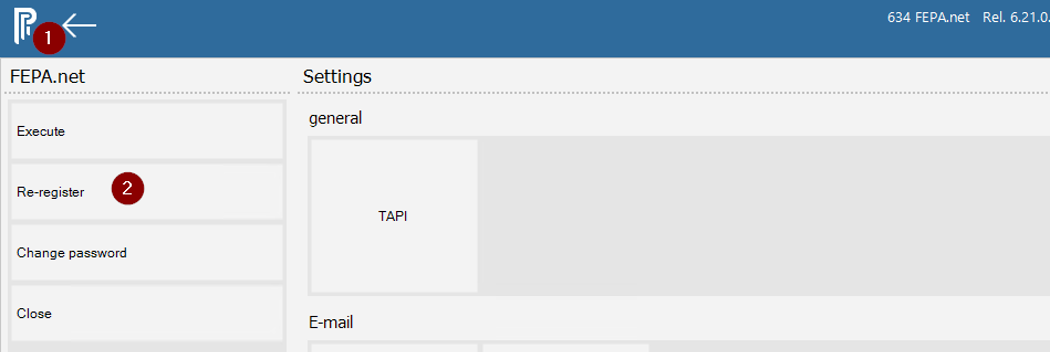
For that purpose everybody can always use the function “re-register” to login into a different FEPA user at any time. You can find the function clicking on the programs logo in the top left (1) and then start the program clicking on “Re-register” (2).
On first login: Please change your password!
When you first start with FEPA you’ll receive an email from IT with your starting credentials. Every user should change this starting password after the first login. This is a security precaution against unauthorized access. The password should never be shared - also not with the colleagues from the IT department.
If you don't know how, there is a document for that: How to change the FEPA password.
How to change the FEPA password?
You don't like your password?
As we're using the Single-Sign-On functionality you should be always able to login from your normal windows account via the remote desktop. But for using the handheld scanners (e.g. stock taking or warehouse movements) you need your password in order to login to the devices. Also you can login into other colleagues computers with your FEPA user for training purposes, if you know your password.
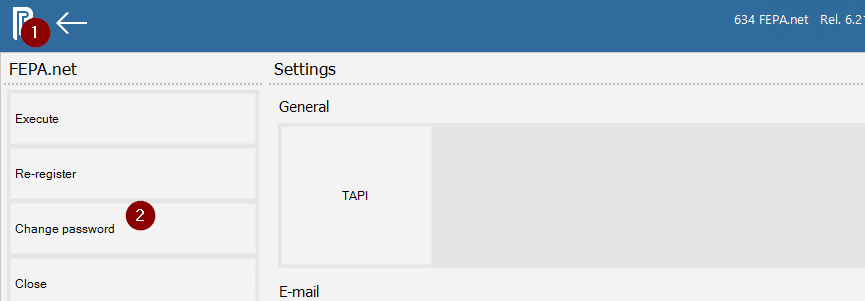
You can choose your new password directly after the login by using the function “Change password”. Click first at the programs logo or the logo text in the top left corner [1]. After you click on the button “Change password” [2] a new program will open:
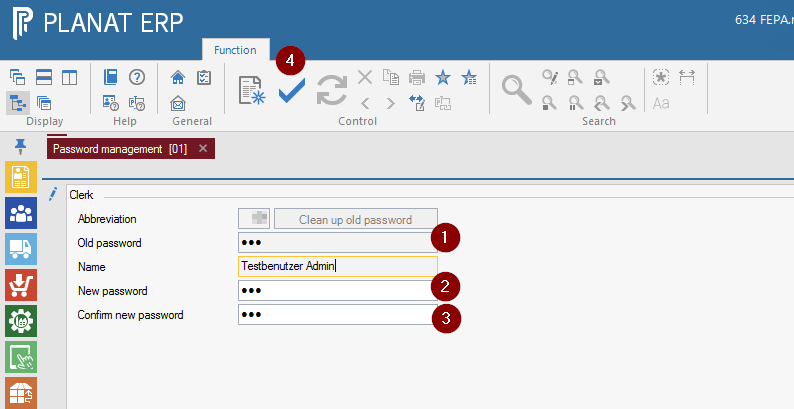
In this program your username will be filled automatically and you can only change your own password. At first enter your actual password [1] and hit return. Then you've been asked to provice a new password [2] two times for confirmation [3]. When you're finishe typing you must approve your change by pressing the OK button [4].
You lost your password?
When you lost your password the IT department can help you by setting a new password for you. Please just send an email to it-support@gemo.de to receive support.
Notes
As we’re using separate databases and infrastructures for each of our FEPA installations (FEPA testing system, FEPA productive system) the password change in one of the systems does not have any influence in the other system.
From time to time the IT department does a copy from the productive system to the testing system and under that circumstances your credentials from the productive system will become valid in the testing system automatically.
So please keep that in mind changing your password in one system and therefore it is a good idea to keep the same password in both systems.
How to change the FEPA language?
Introduction
FEPA is available in several languages (English, German, Polish and Chinese). Besides IT, you can also customize your FEPA language yourself and this page shows you how.
Open program to change the language
Path: Utility program > Settings > Change FEPA language
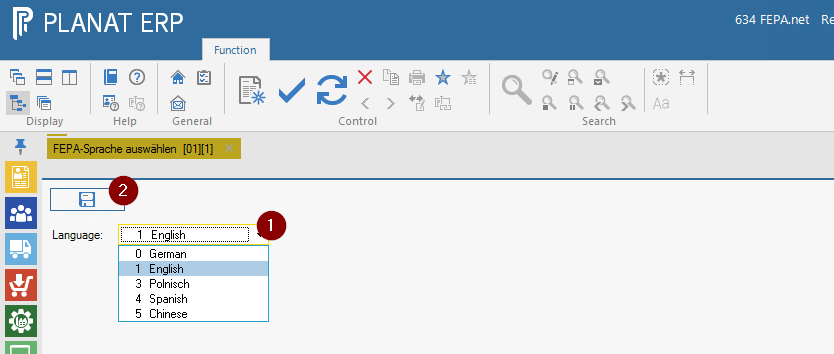
In the program, first select the language [1] and then confirm this change with the Save button [2]. The change is only valid after you have restarted your FEPA.
General
In FEPA, a standard printer and other printers can be assigned to a user. This is not done via the Windows user, but via the name of the computer (host name). This is done by IT. If there are no stored settings for the user/PC, FEPA uses the Windows default printer of the RDP session.
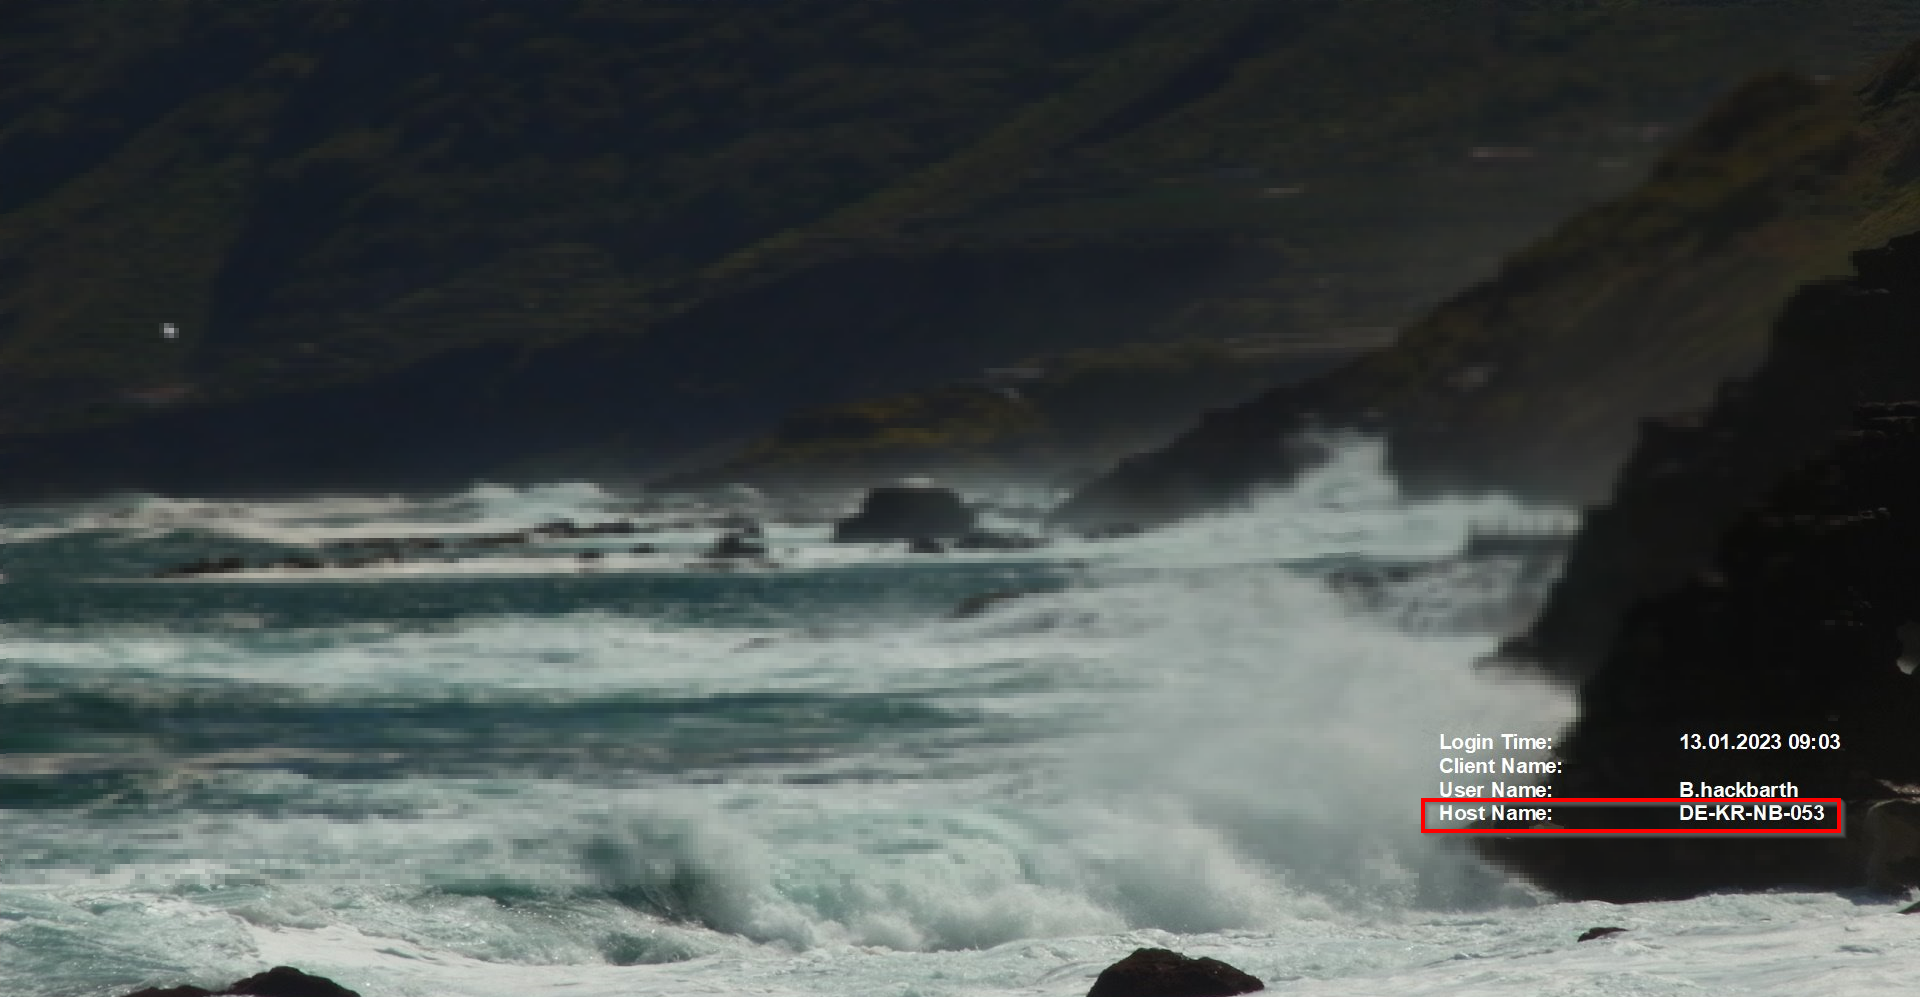
If forms are to be printed on certain printers, e.g. on letterhead paper, this must be set up by IT. To do this, send an email to the ticket system (it-support@gemo.de) stating the PC name/host name, the printer name and the desired forms. You will find the PC name/host name at the bottom right of your desktop.
Where can I find my computer name?
Display your desktop on the computer (not in the RDP session), at the bottom right you will find the display as shown in the picture. The "Host Name" is the name of your computer.
How do I set my Windows default printer?
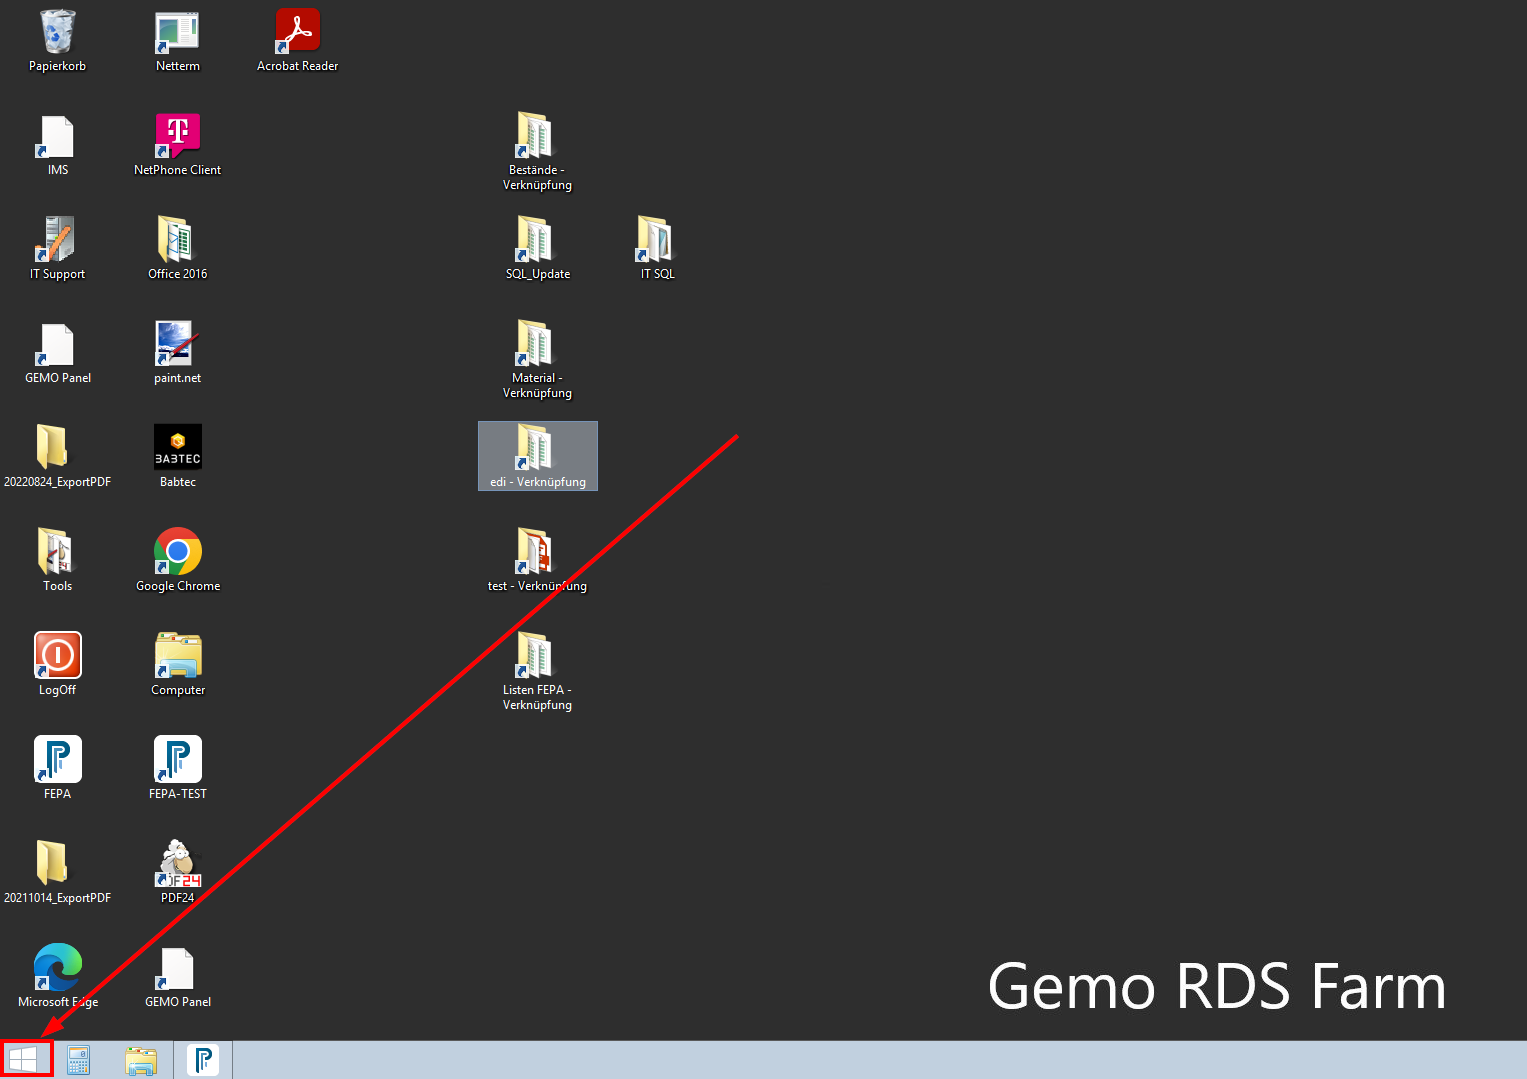
Click on "Windows Start" with the mouse.
Click on the "magnifying glass" at the top right of the picture.

Enter the text "printer", then you will see a number of options to choose from, here click on "Devices and Printers".
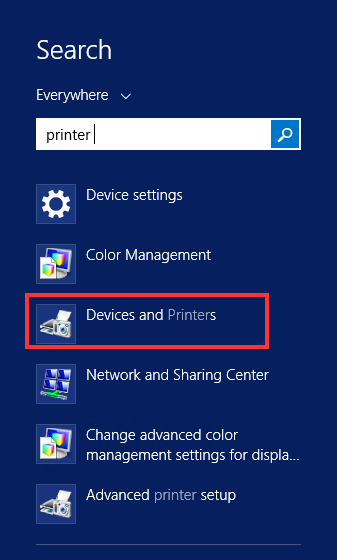
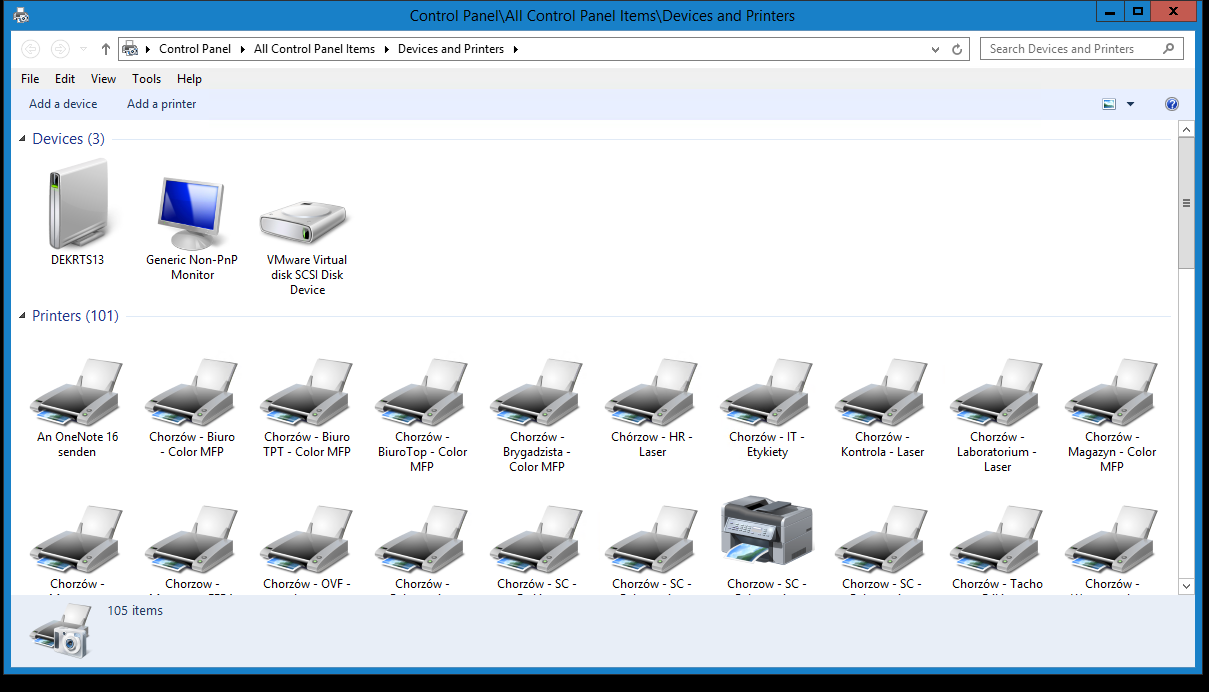
Then the list opens and you have to search for the appropriate printer.
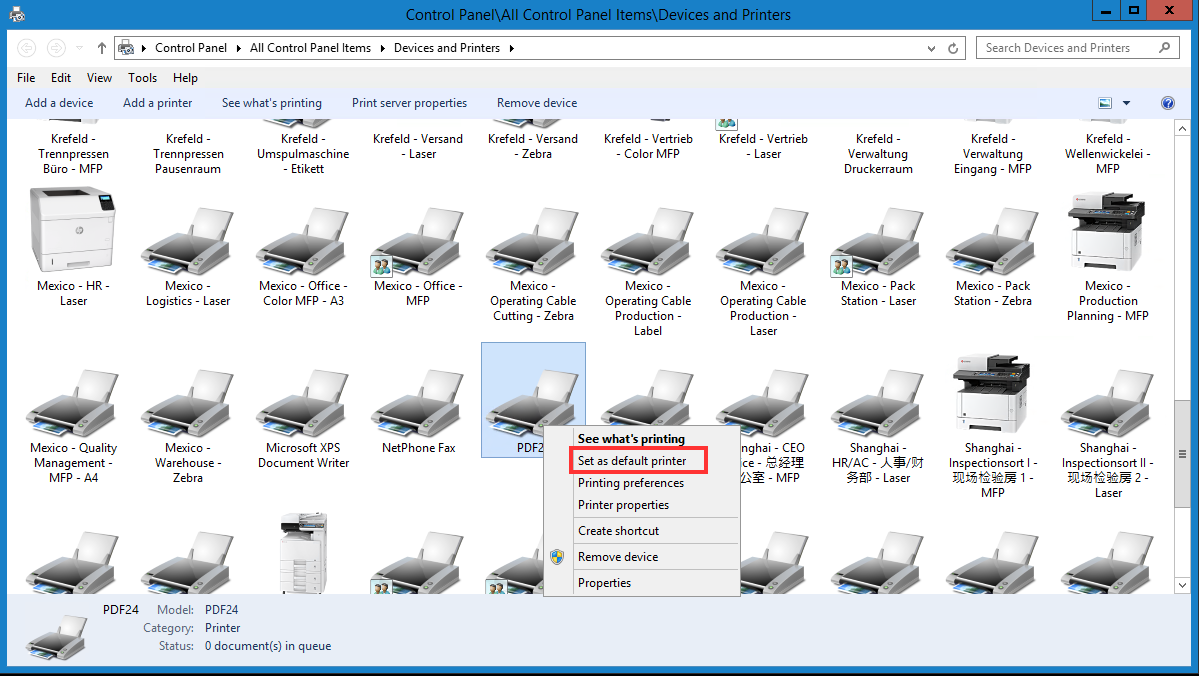
Right-click on the desired printer and click on "Set as default printer" in the context menu.
The printer is now marked with a green tick. The window can be closed.
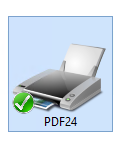
The printouts should now be printed on this device.
In the past, this setting was often changed in Windows on the terminal servers. It would be safer to at least store the default printer in FEPA for the computer name.
If the printer cannot be found in the list, a ticket must be opened (email to it-support@gemo.de) with the information which printer is missing.